How to Manually Compile Android Apps
While this step isn’t mandatory with the Apptekz Mobile App Builder, it is possible to compile our apps manually for those that prefer to do it this way or that want to make direct changes to the source code before publishing.
To generate the APK file or AAB
To manually generate the Android APK file or AAB of your app, follow the steps below or generate the APK/AAB automatically with the Apptekz APK/AAB Generator. If you prefer to have it done for you, please open a support ticket and make your request at: https://apptekz.com/support
To manually generate the APK/AAB from the source files:
Android Studio is required to generate the APK/AAB manually. If you haven’t already, download and install Android Studio to generate your APK/AAB package.
Android Studio version 4+ is now required (you can download it here). Follow the process below to set up Android Studio.
How to Setup Android Studio for use with the Apptekz Mobile App Builder
Download the 4+ version of Android Studio: click here
Install Android Studio
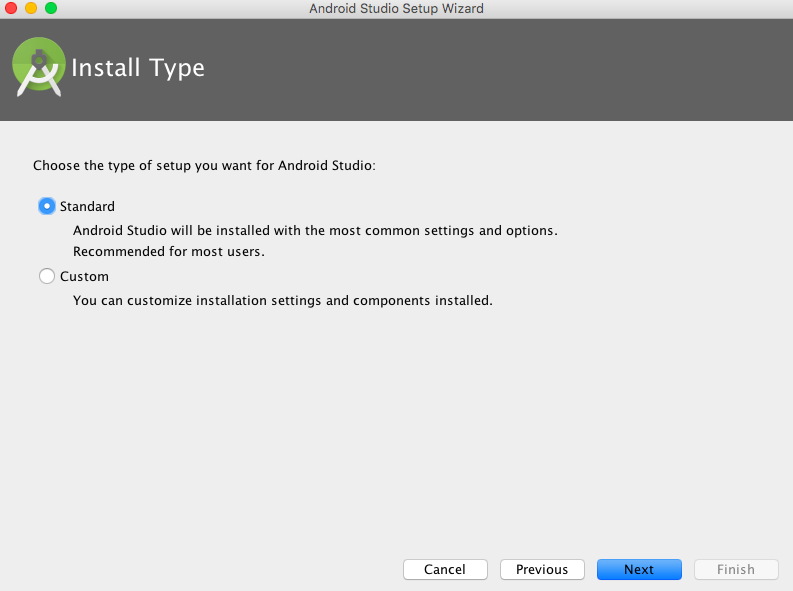
Choose Standard:
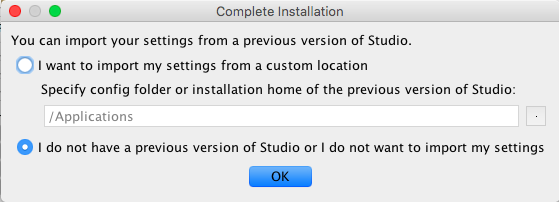
Select this setting (“I do not have a previous version of Studio or I do not want to import my settings”):
Using Android Studio, create the APK/AAB Package
How to create an APK/AAB
Note: Be sure that Firebase for Android Push notifications are configured for your app prior to generating the app source code and for use in creating your APK/AAB.
From your Mobile App Editor CMS, download from “Mobile Source Codes & Builds” and download the Android Source files by clicking on “Android Version”:

Unzip this file.
Then go back to the main menu of Android Studio:
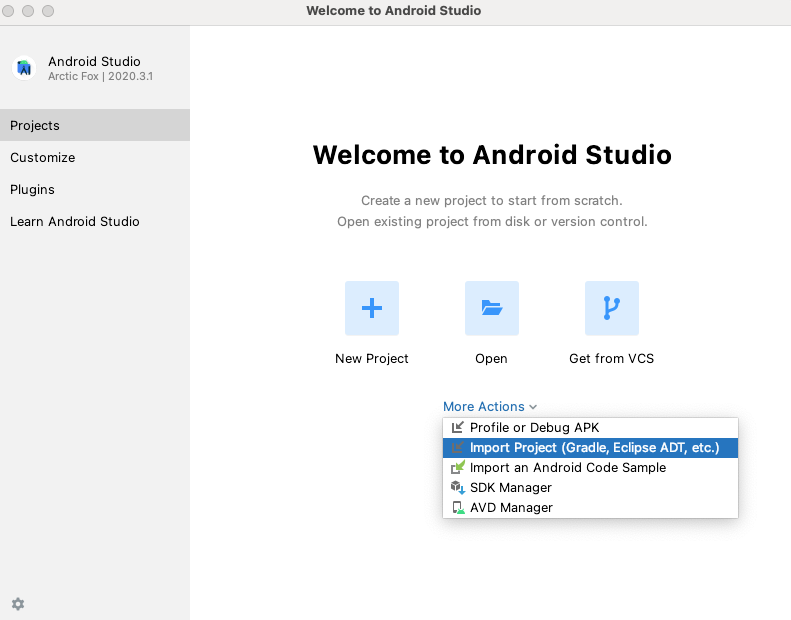
Click on “More Actions” > “Import project“.
Then choose the Android Source folder you have unzipped, and click on “Open“.
Do not update Gradle if Android Studio asks you.
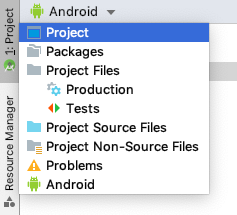
When your project is imported, from the left menu, click on Project and select Project in the list to display your folder “android_source” and open the tree.
From the main menu click on Build > Generate Signed Bundle / APK…
Select Android App Bundle or APK:
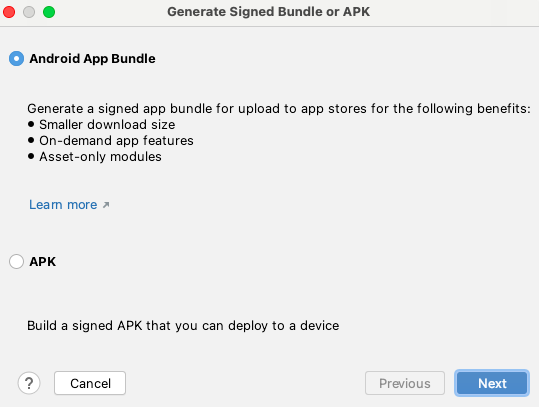
Then, click on Next and you get this screen:
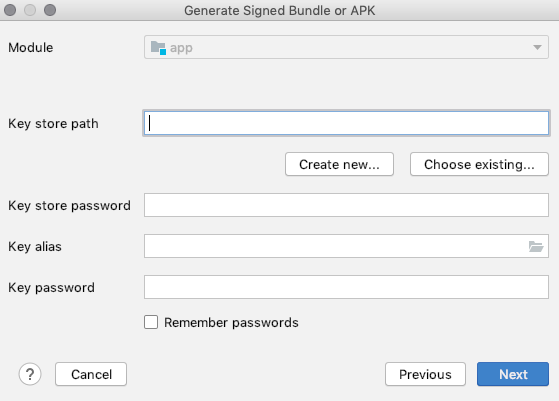
Depending if it’s an update of an app already published, or a new app choose:
– “Create new“, for a new app
– “Choose exiting“, if updating of an app that’s already published
(In this example, we are going publishing a new app, but updates will require nearly identical steps)
Okay, so in the case of a new app, we’ll chose “Create new“. (if updating, choosing existing is really the only difference in the process)
We recommend that you organize iOS folders the same way we’ve done for the Android version to keep things organized (if you haven’t already, download your iOS source code into it’s similar folder structure)
We will assume that you have already created a folder for your app publication on your computer and have downloaded the android source files into that folder. Let’s say you have created a folder on your computer named “My Awesome App”, for instance, with two subfolders: one for the graphic items, like screenshots of this app, and one for the certificates which will be named “certificate”.
Thus, on your computer we have a folder named “My Awesome App” with the subfolder “certificate” and the other subfolder “graphics”.
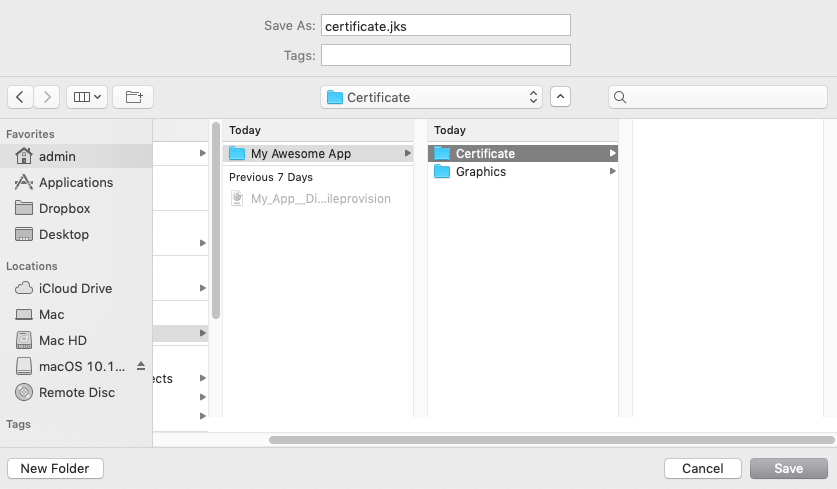
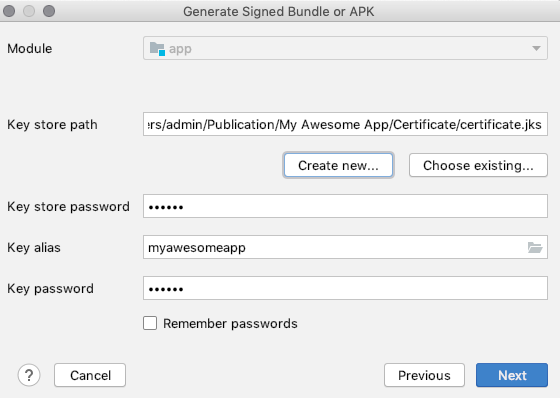
Let’s go back to Android Studio. After you have clicked on “Create new“, you will see this screen:

Now click on the button to browse in your computer folder and go to the “Certificate” folder, in the main folder “My Awesome App”, enter “certificate.jks” in ‘Saves As:‘ field, and click on Save:
Enter a password for the Key Store, enter an alias name (the name of the app is OK), and a password for the Key Alias, set the validity period to 25 years, and enter the name of the app owner. Then click OK:
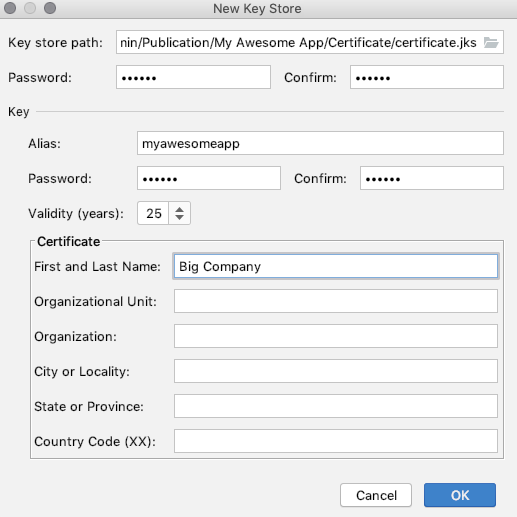
In the summary screen click Next :
Then in the next screen, choose “release” for Build Variants and click on Finish.
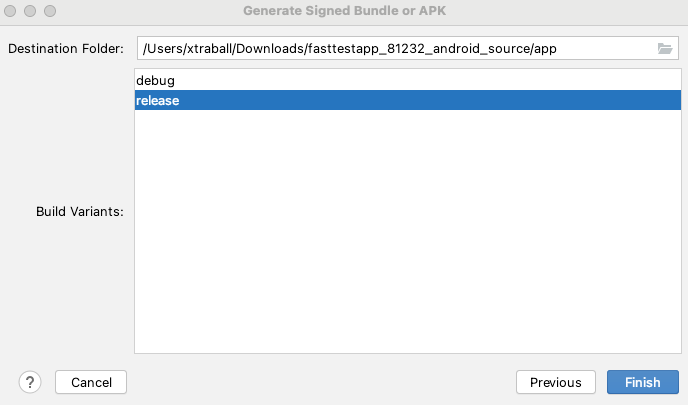
The generation of your AAB/APK will begin
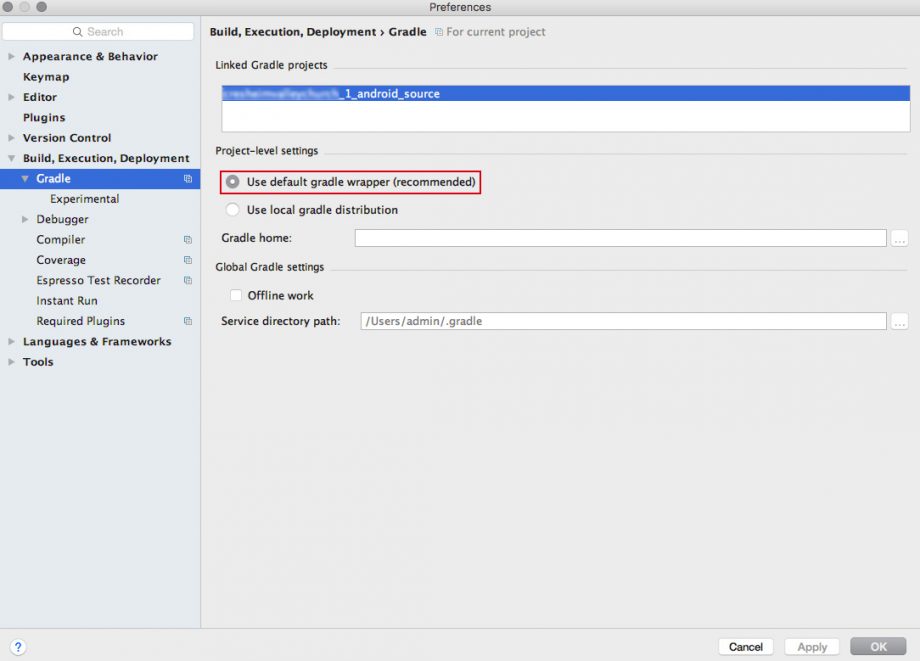
NOTE:
From Android Studio 2.0 and later you may encounter the error “Error:’com.android.build.gradle.BasePlugin’ does not implement the Plugin interface.”. To fix this problem, just go in the menu of Android Studio in Preferences > Build, Execution, Deployment > Gradle, and then check the option “Use default gradle wrapper” as shown in the image below:
Once the AAB/APK is generated, follow the link to the article referenced below to publish your app on the Google Play Store:
https://apptekz.com/how-to-publish-your-android-app-on-the-play-store/