OneSignal Push Notification Update
OneSignal Push Notification in Apptekz Mobile Apps v5.x now supports Firebase and OneSignal Push Notifications to enable better push notification delivery and performance for Native Apps. This update will replace our current Native Push Notification technology.
This core change to our platform requires republishing each app as soon as we implement our new Push v2 technology and integration. One of the key changes to the current workflow is that OneSignal requires a separate configuration per app for both Firebase and OneSignal and we’ve updated individual Push capabilities for direct targeting using “Segments” and “Tags” in OneSignal and we have also implemented support for Geo Targeting.
In this article, we’ll show you how to configure everything necessary to update your apps to use the Push v2 feature.
How to configure Firebase / OneSignal Push Notifications
- Requirements: You’ll need a Firebase account for Android & an Apple developer account for iOS
- Process: Create a OneSignal and Firebase configuration for each app before publishing
We’ll break this process into 7 basic steps:
- OneSignal – Create/Configure a OneSignal Account for each App that will be published
- Firebase – Create/Configure Firebase by creating an App configuration for each App that will be published
- Setup Platform (Integration) – Link App configurations between OneSignal & Firebase.
- Setup API Keys for the App in the Apptekz Mobile App Builder
- Import existing Push tokens from published apps before upgrade
- Setup iOS Push configuration
- Send a Push Notification (Test)
Refer to the steps above as a checklist to make sure you don’t miss anything.
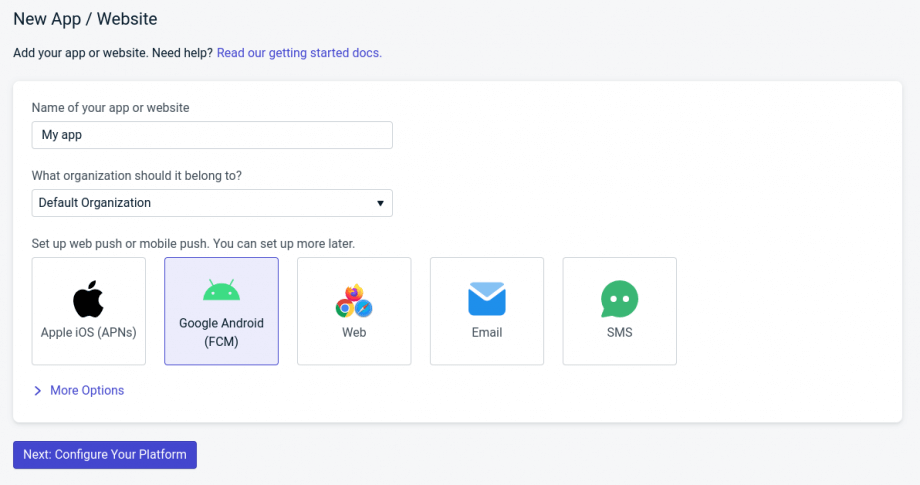
Add a New App to OneSignal
Open or Create a OneSignal account, then add an app, giving it the same name as your Mobile App
Select Android to start
Configure Google Android (FCM)
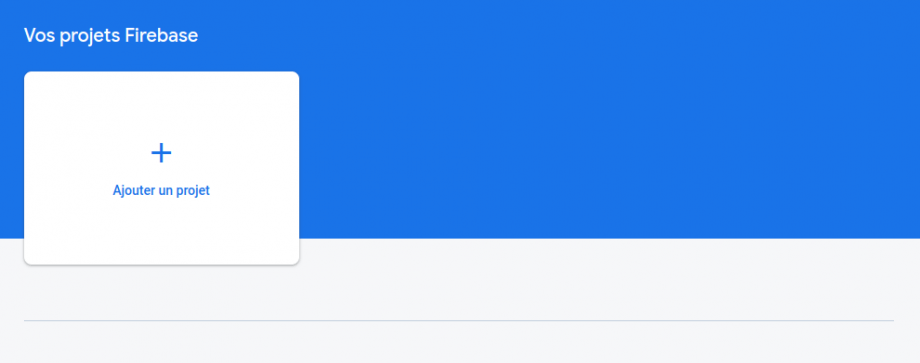
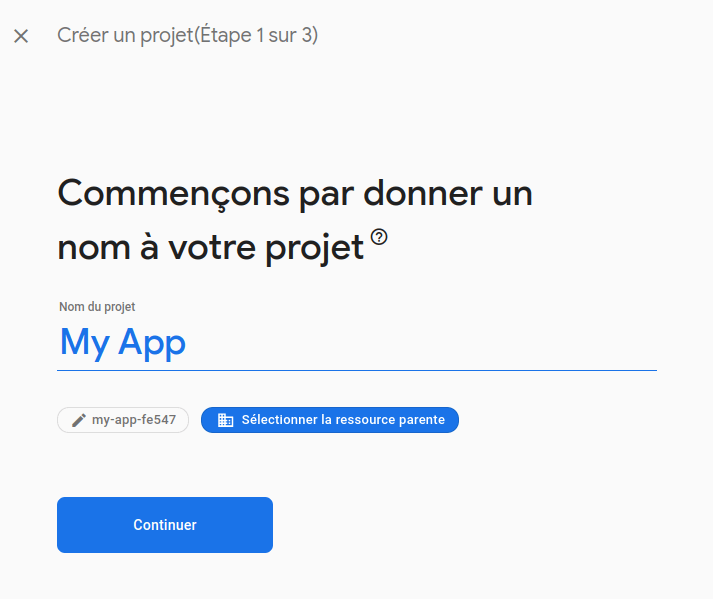
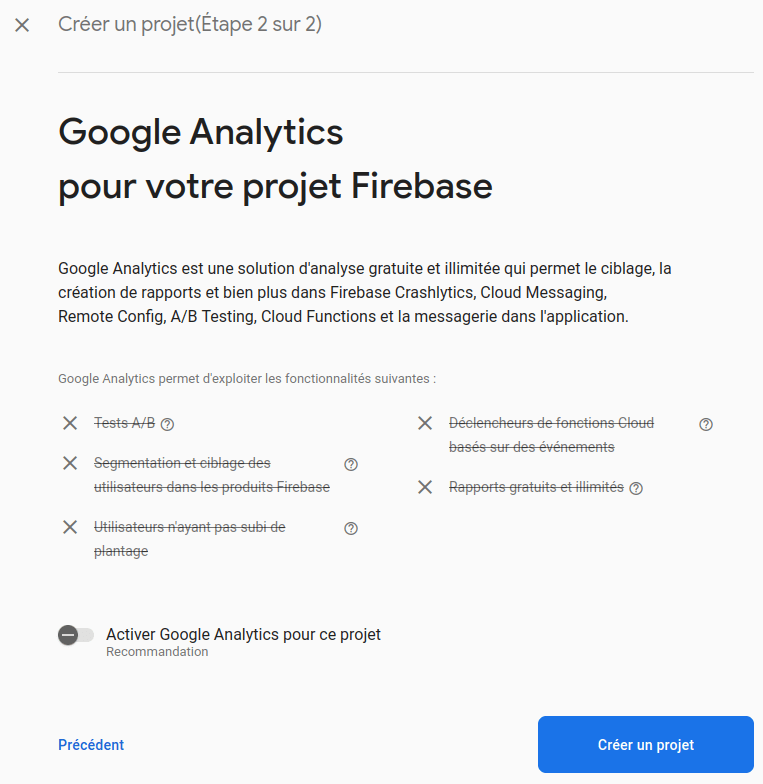
Go to your Firebase console and if not done yet, create a new application
Or follow the OneSignal documentation
https://documentation.onesignal.com/docs/generate-a-google-server-api-key
Disable the Google Analytics for now, you’ll be able to configure it later if you want to use it.
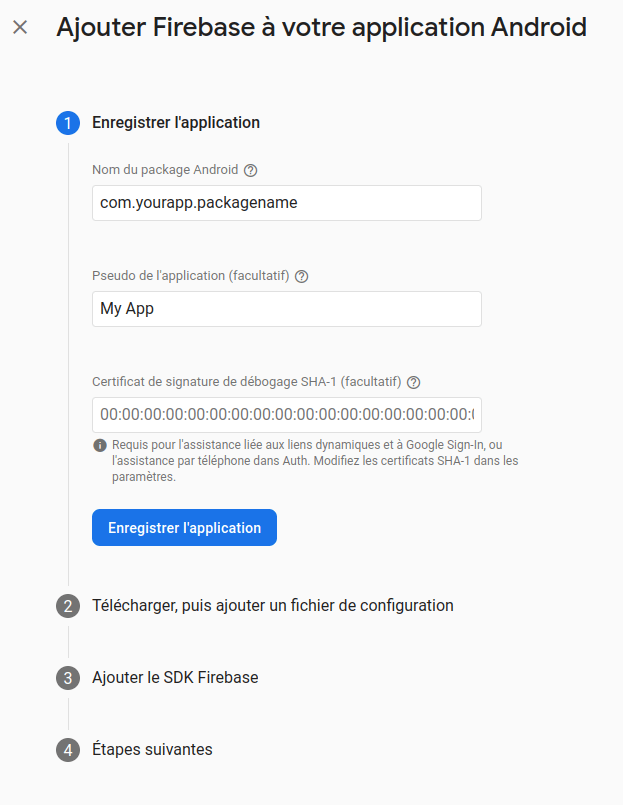
Configure a new Android app, click on the rounded android icon in the middle of the page
Paste the application ‘Package Name; and ‘App Name‘ from the Apptekz Mobile App Builder, then next/skip all other steps
Go back to the Firebase console homepage, then click on the gear on the top left of the page,
then open the Cloud messaging tab
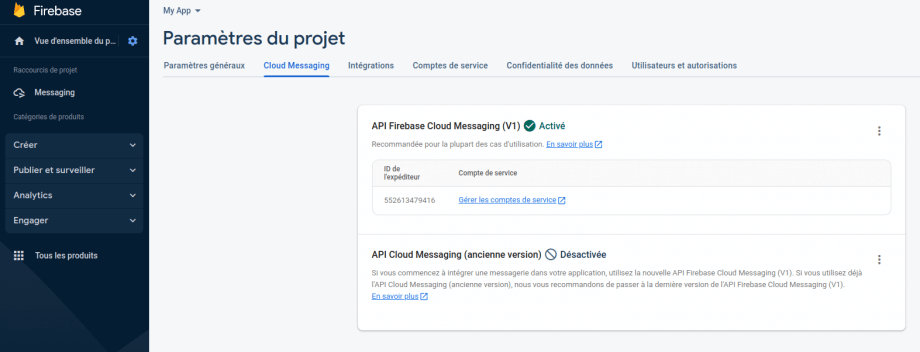
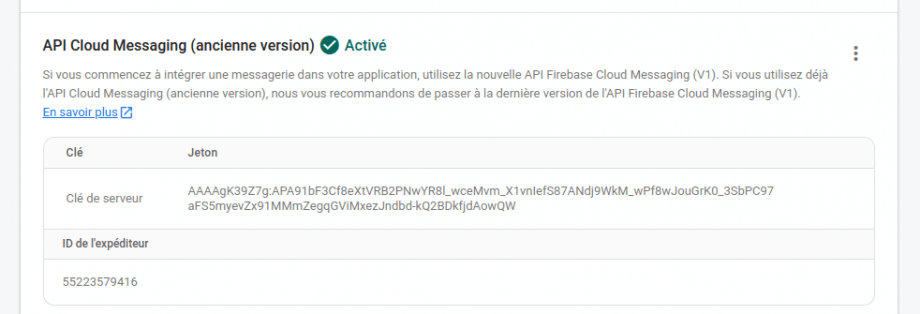
Click on the three dots beside API Cloud Messaging (old version) then activate the API
Go back to this page and reload, you should now have access to both a server key and a sender id
Now that the application is created & configured, paste your keys into OneSignal

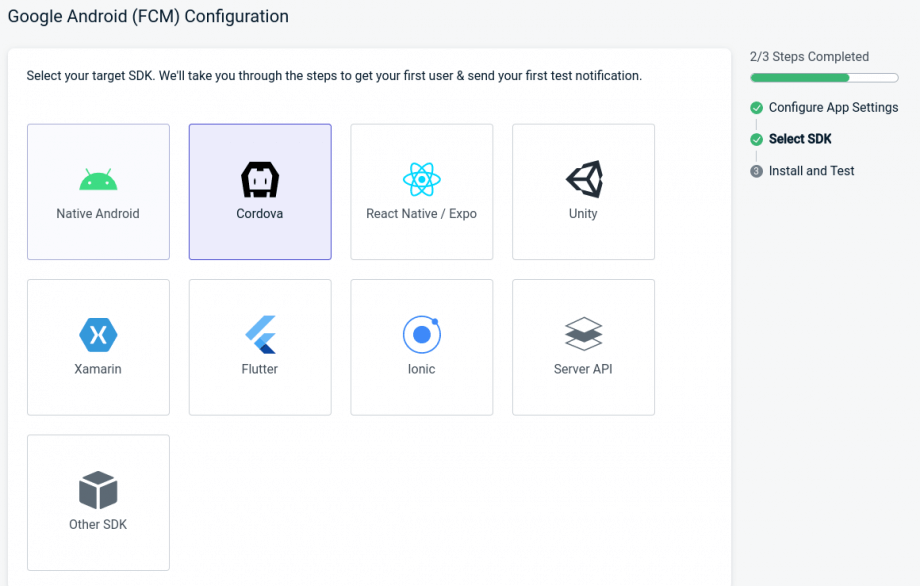
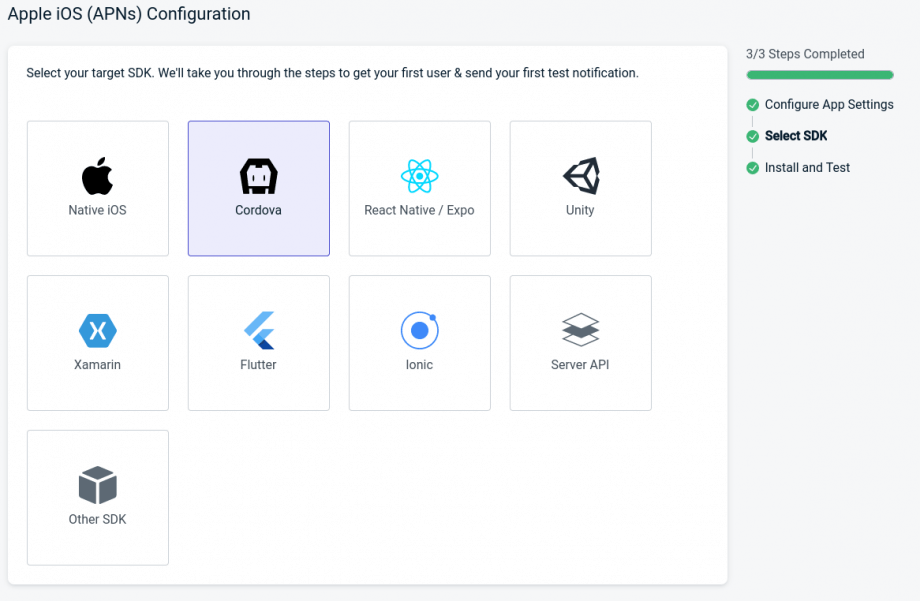
Save and continue, then select Cordova as the SDK, continue
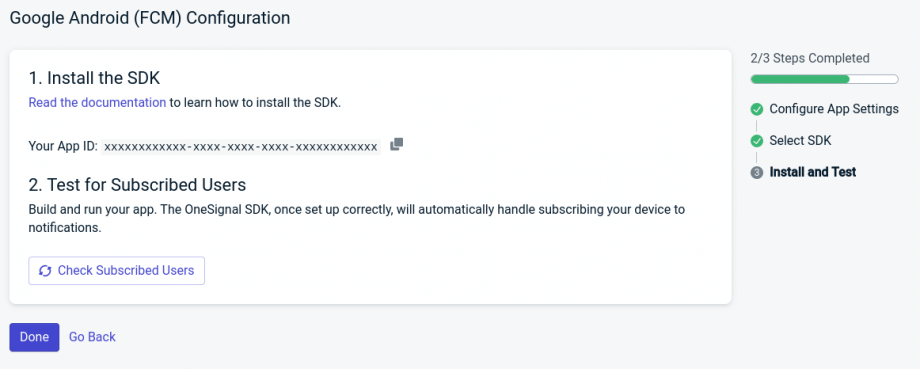
Now just click done!
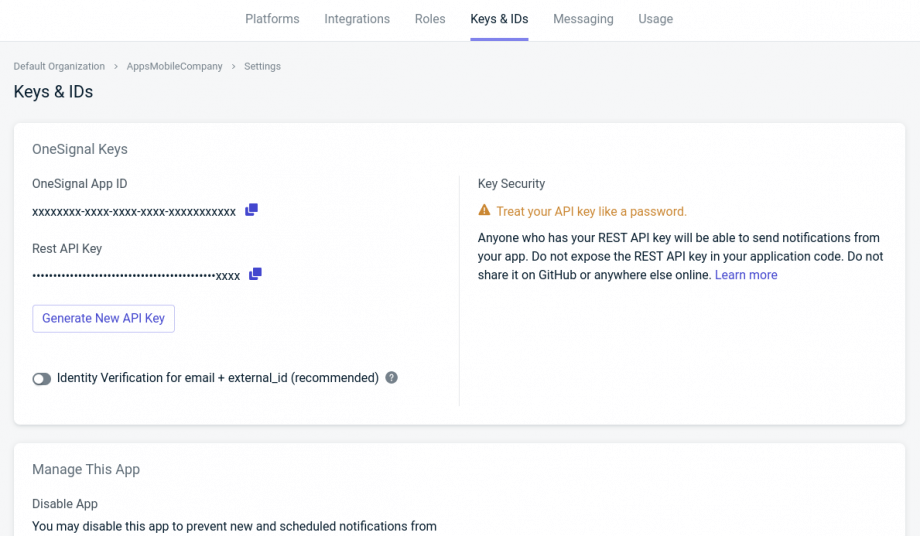
Navigate to the page Keys & IDs to locate the keys that will be copied and pasted into the Editor for the Mobile App Configuration.
At this point, we have completed only the Android steps so far, but these same keys will work for both Android & iOS
However, we still have a few more steps to finish the configuration for iOS
Go to the Settings > API page of your Mobile App
Then paste your App ID and key
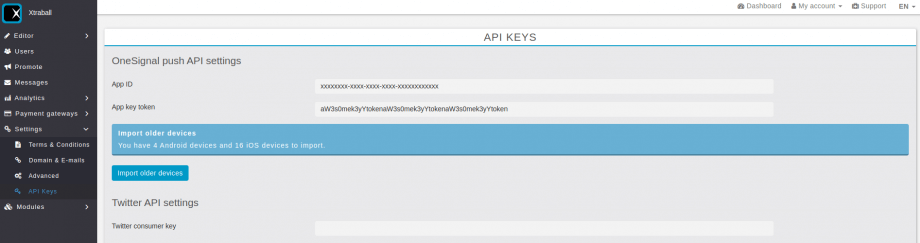
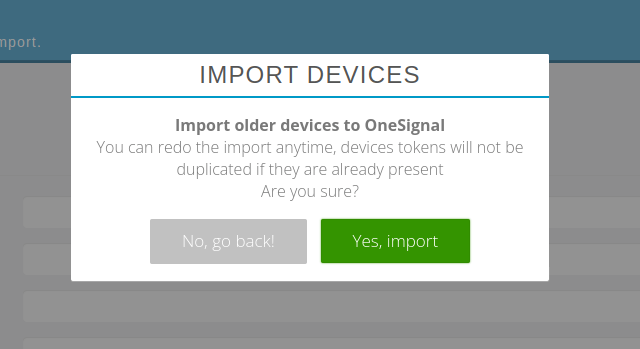
After that, you will be able to import older devices
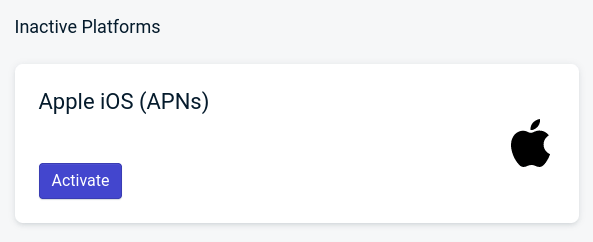
Configuring iOS
Go to the platforms page & add Apple iOS
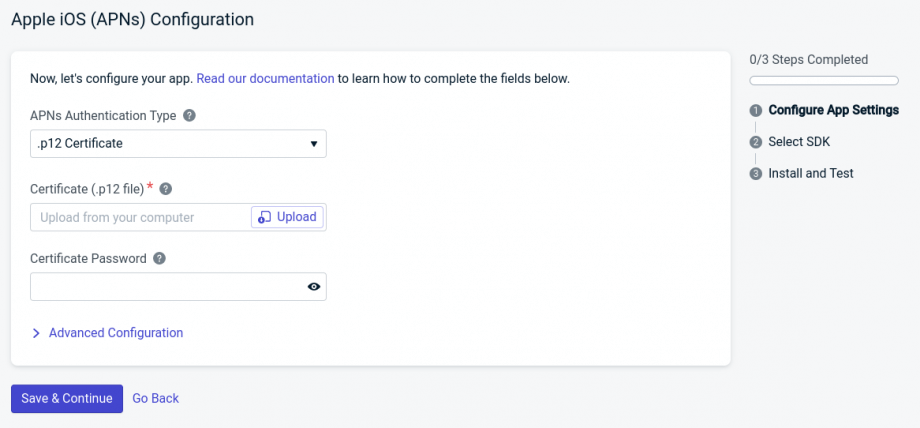
For more in depth and help to create a p12 key, please check the OneSignal documentation below
https://documentation.onesignal.com/docs/generate-an-ios-push-certificate
Upload your key, then save & continue
Same as for Android, select the cordova SDK, then next, you’re done!
Sending Push Notifications with Push v2
To send a new push, first add the push v2 feature to your application
Then, fill in the Title & Message and send now or schedule your message to send in the future
Note: The scheduling is timezone friendly, the message will be sent at the given time, depending on the user timezone, default delivery time of day if left blank is 9:00 AM
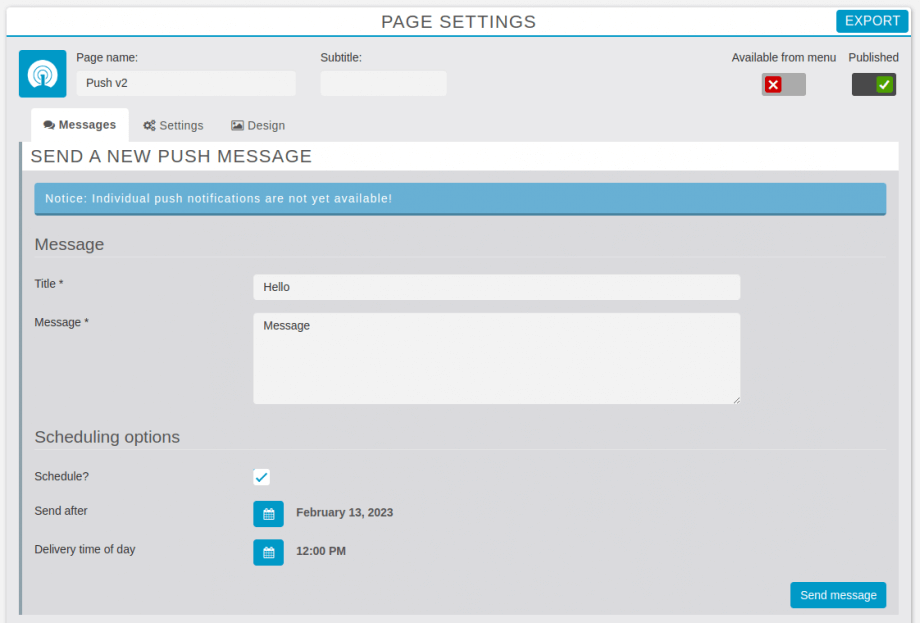
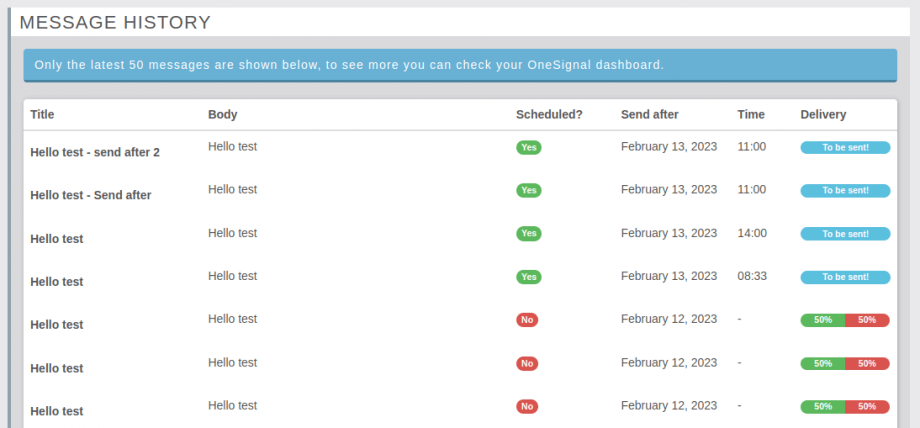
Hit Send message
The message history will be shown below, it can take a few seconds to display the correct Delivery status & rate (just reload the page)