How to Manually Compile iOS Apps for Publishing
In this article, we’ll walk you through the entire process and explain how to publish an iOS app on the Apple App Store. We’ll also give some tips and a step-by-step video.
Things to know before publishing
Xcode & MacOS
To publish an iOS App, a Mac computer is required to use Xcode software. Alternatively, this can be done on a cloud based Mac running Xcode.
While outside the scope of this article, it is possible to get by without any Mac at all if able to emulate one to support installation of MacOS and Xcode on a virtual Mac computer. Here is an article if that is of interest. https://www.udemy.com/blog/xcode-on-windows/
The Certificates
An iOS publication under one developer account needs 4 files, one file that will sign the certificates and 3 certificates. The file that will sign the certificates and one of the 3 certificates are used for all apps published under that one developer account, the two other certificates must be created each time you publish a new app.
Note: The specific developer that creates the certificates will need to be the same developer user and email account that does future updates. Otherwise, upon certificate expiration, instead of certificate renewal, the app will need to be republished with new certificates, if done using a different developer in the same Developer account as old certificates can’t be renewed by another login.
The two files used for all apps published under a single developer account:
These 2 files will be created only once. This occurs the first time you publish under this developer account. It is the CertSigningRequest (CSR) and the iOS distribution certificate (iOS Distribution). The CSR is created from your computer (must be a Mac) from the Keychain Access, and the iOS Distribution is created from the Member Center at developer.apple.com.
These two items must be stored in the main certificates folder for this developer account on your computer (it will be better in terms of organization if you are willing to publish other apps under this account). Thus, if we consider this example, for the client named “John Doe” who has his own developer account, on your computer there will be these folders with this organization:
- IOS apps
- John Doe
- Certificates –> CSR and iOS_Distribution for John Doe account must be stored here after you have created them
- John Doe 1st app
- Certificates
- Screenshots
- John Doe
You will use this CSR and iOS_Distribution certificate for all the apps that you will publish for John Doe, if there are several apps to publish under this account. You create once, and use them each time you publish an app for John Doe under his account.
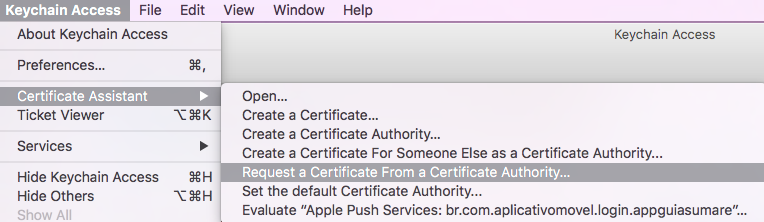
For your information, the Keychain Access to create the CSR is in your Mac in Applications > Utilities.
The two other certificates are the Apple Push Services certificate and the Mobile Provisioning Profile. You will have to create them for each app, as you can see in the video. You will store them in the certificates folder which is in the app folder. Thus if we consider the previous example, for the client named “John Doe” who has his own developer account:
- IOS apps
- John Doe
- Certificates
- John Doe 1st app
- Certificates –> Apple Push Services certificate and Mobile Provisioning Profile for John Doe 1st app must be stored here after you have created them
- Screenshots
- John Doe
Create Screenshots for the App Store
You will need to create screenshots to fill out the app sheet to publish the iOS app. These screenshots can be made with Xcode and specifically with the iOS Simulator included with Xcode.
Open the Xcode project that is in the ios_source folder (see in the video when opening the project with Xcode), then choose the target, iPhone 8 Plus for instance, then click on the Play button (FYI, the ios_sources of an app can be downloaded by the Platform/App owner from its application page):

Take the desired screenshots of the app for this target using CMD+S from your keyboard, and perform these steps for each target you want to create screenshots. Before switching from one target to another, be sure to click on the “stop” button in Xcode.
Steps to Compile an iOS app
Create the items related to the developer account with which you are going to publish
You must create a CSR file and an iOS Distribution certificate. These items will be used for all future apps you will publish under this App Developer Account –> keep them in a safe place, once created.
The CSR File
CSR file must be created from the keychain access tool of your Mac. Open it from Applications > Utilities > Keychain Access:
From the menu select “Keychain access” > “Certificate Assistant” > “Request a Certificate From a Certificate Authority”:
In the window that opens, enter the email of the developer account (or any other email address, it doesn’t have any impact), and enter the name of your developer account, and select “Saved to disk”:
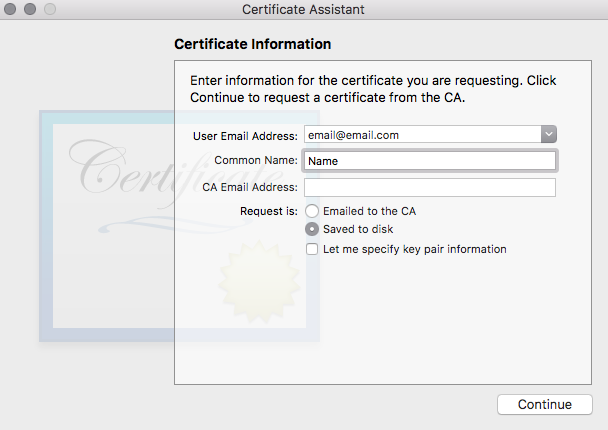
Save this CSR to your disk, in a folder related to the certificates of your developer account.
Close the window after saving.
The iOS Distribution Certificate
– Connect at https://developer.apple.com/membercenter/index.action with the developer account
– Click on “Certificates, Identifiers & Profiles”
– Click on “Certificates” in the menu on the left, then click on ![]() :
:

– Choose “iOS Distribution (App Store and Ad Hoc)” and click on “Continue”:

– Sign your iOS Distribution certificate with the CSR file you have created before.
– Download the iOS Distribution certificate that has been created.
– Double click on the iOS Distribution certificate (ios_distribution.cer) to add it to the Keychain Access.
Create the items related to the app you are going to publish
The Apple Push Services certificate
Thanks to this certificate you will be able to add push notifications, in-app purchase, and other services to your app. In our case, only the push notification service is interesting.
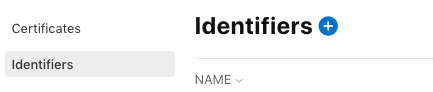
– Click on “Identifiers” in the menu on the left, then click on ![]() :
:
– Choose “App IDs” and click on “Continue”:

– Enter your app name, the Bundle ID of the app:
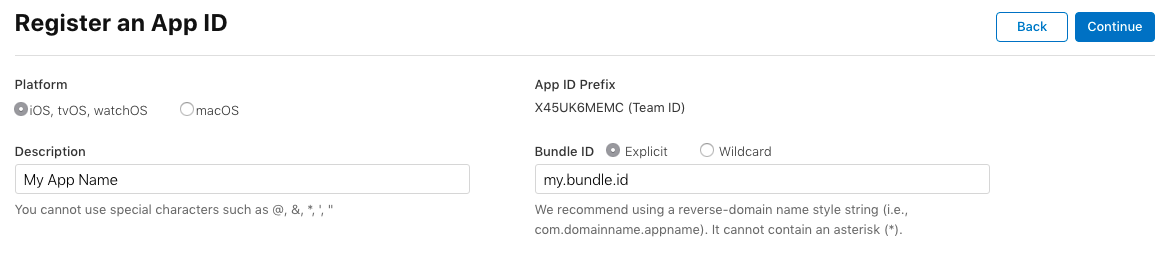
– Go below and select “Push Notifications” in the list of “Capabilities“:

– Click on “Continue“.
– Then click on “Register“.
– In the list, find the App ID you have just created and click on it.
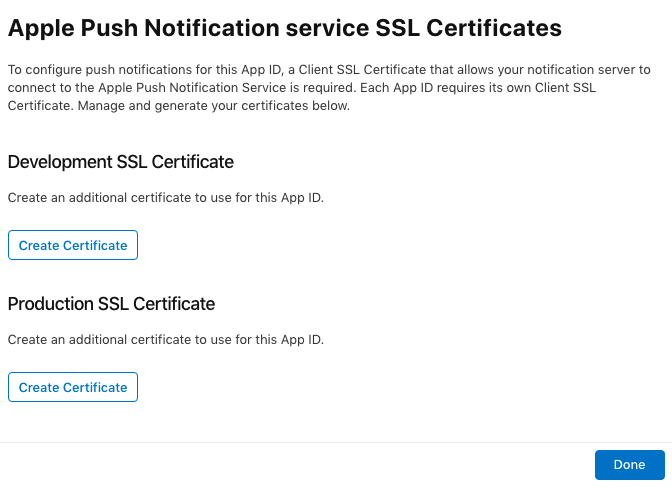
– Go at the bottom and for Push Notifications, click on “Configure”:

– In “Production SSL Certificate” section click on “Create Certificate”:
– Click on “Choose File” and upload the CSR file you have created before for this developer account (the same CSR you have used to create the iOS Distribution certificate for this developer account):
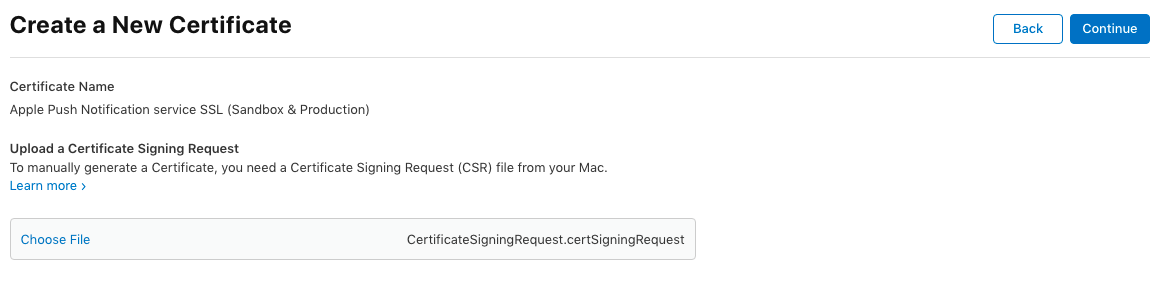
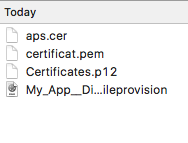
– Download the Apple Push Services certificate (aps.cer) that has just been created. Store this certificate in a folder related to this app on your Mac.

– Click on “< All Certificates“.
-Double click on the Apple Push Services certificate (aps.cer) to add it to the Keychain Access.
The Provisioning Profile
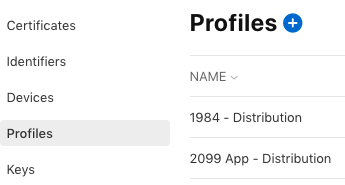
– Click on “Profiles” in the menu on the left, then click on ![]() :
:
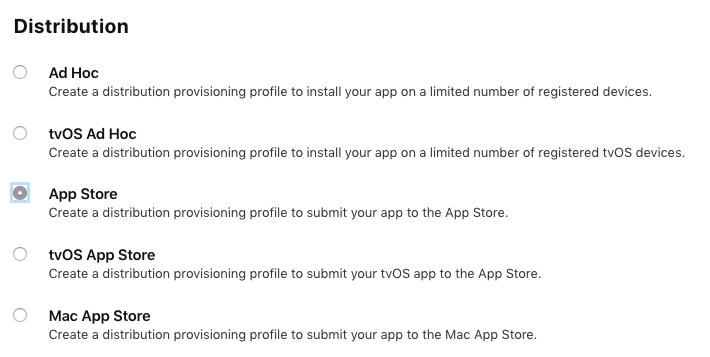
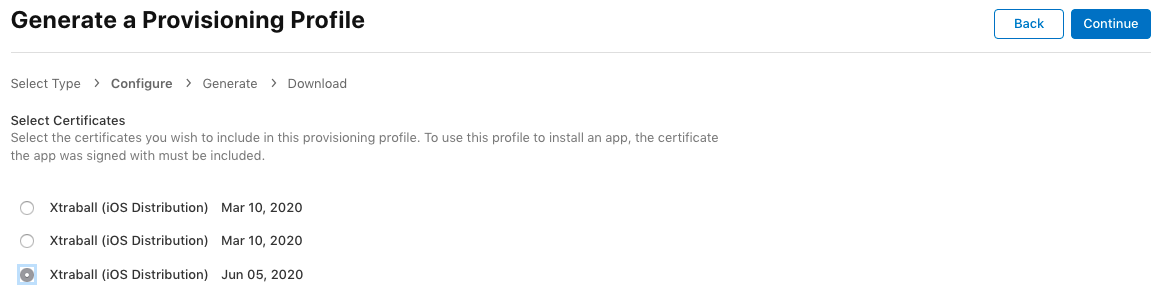
– Choose “App Store” under “Distribution“:
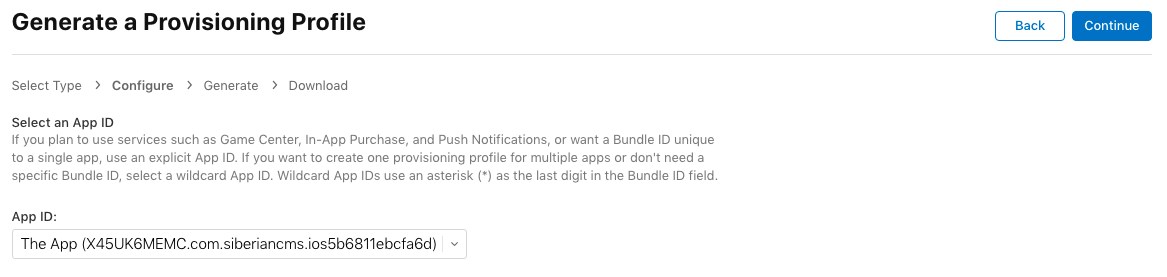
– Select the App ID of your app, and click on “Continue”:
– Select the iOS Distribution certificate associated to the CSR you have used to sign the Apple Push Services Certificate you have created just before (it is very important to use the iOS Distribution which has been created with the CSR used to sign the aps.cer of this app. Don’t forget it, and don’t forget that in case you create a new aps.cer for this app with another CSR you will have to create a new provisioning profile too with the iOS Distribution certificate made with this CSR, and then to publish an update of your app on the App Store)
– Click on “Continue“.
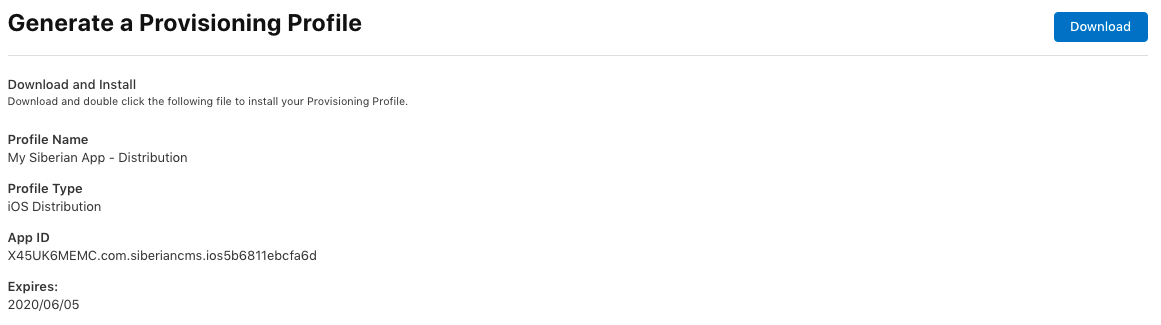
– Name the Provisioning Profile and click on “Continue”
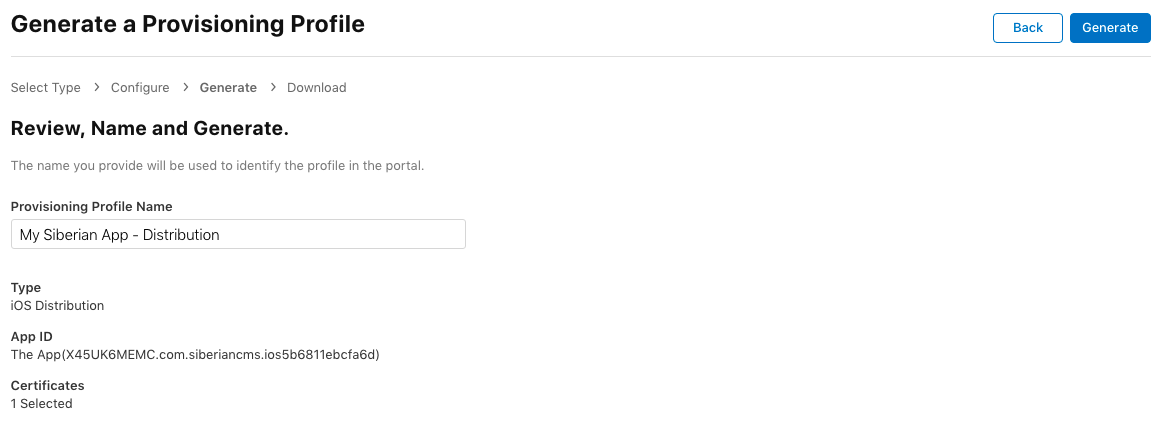
– Download the Provisioning Profile that has just been created. Store this certificate in the folder related to this app on your Mac, and which contains the Apple Push Services certificate created just before.
Compiling the app
– Download iOS source code.
– Unzip the folder and open the .xcworkspace file by double-clicking it.
– If you haven’t already, add the Apple developer account to Xcode.
Go to Xcode > Preferences…
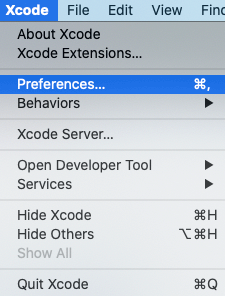
Then on the Accounts tab:

Click on the + to add an account and select Apple ID:
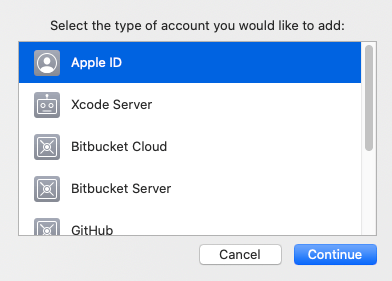
Then enter the Apple ID and its password.
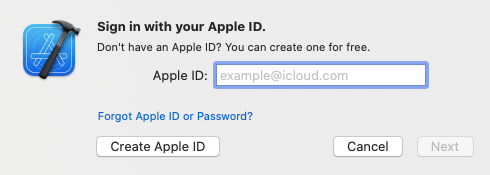
The Apple developer account will be added.
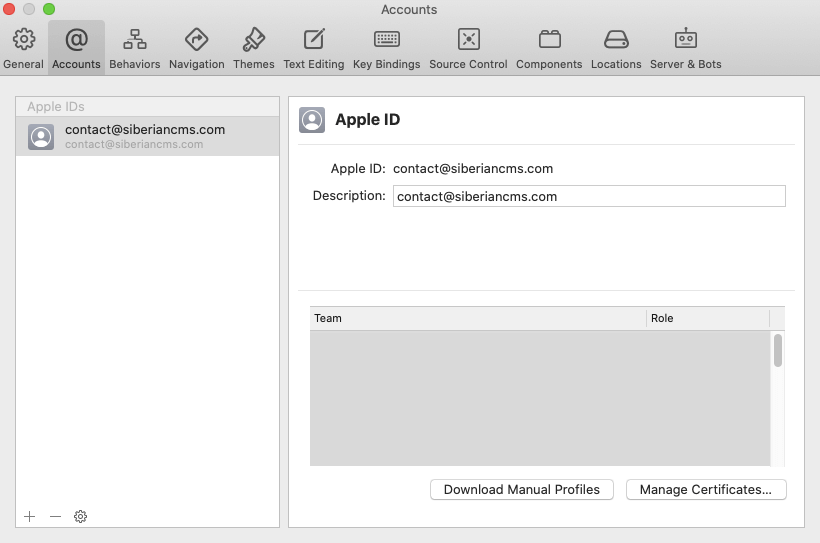
Note: At this point, you’re able to add additional Apple developer accounts as needed.
(This could be useful to allow others to access or manage the developer account on behalf of the business owner)
– Follow this video to compile the App in XCODE:
Note: App must be created on App Store Connect before sending the build with Xcode
(Follow Step 1 > 3 of this documentation).
Creating the .pem certificate
– Go in the Keychain Access on your Mac
– From the left menu, select “Certificates”
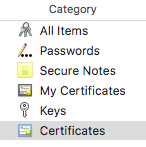
– In the search bar at the upper right, enter the bundle ID of your app
– Click on the arrow on the left of your “Apple Push Services” certificate, a private key must be attached under it

– Select the private key and the certificate
– Right-click on them
– Select “Export 2 items…”

– Choose your desktop as the destination (it can be another location but you will have to adjust the code we will give you after)
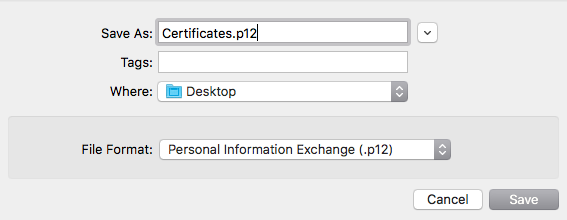
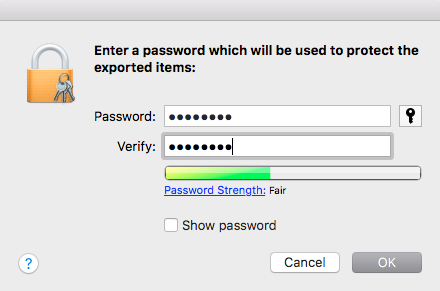
– Choose a password of your own
– Open the Terminal console of your Mac (From Applications > Utilities > Terminal)
– In the Terminal, be sure to be located on your desktop (you must have “Desktop” displayed and then your username)

– Enter this command:
“openssl pkcs12 -in Certificates.p12 -out certificat.pem -nodes -clcerts”
(If the terminal answers that there is no file named “Certificates.p12”, go on your desktop and check what is the name of this certificate .p12, and enter this name rather than Certificates.p12 in the command line)

– Enter the password you have used just before to export your certificate on your desktop

– On your desktop you have now two certificates: a Certificates.p12 and a certificat.pem.
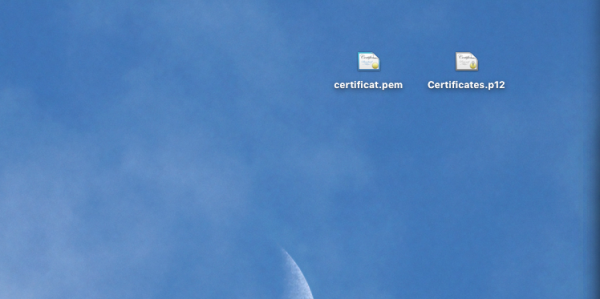
– Move these files to the folder of your app on your Mac (with the provisioning profile and the aps.cer)
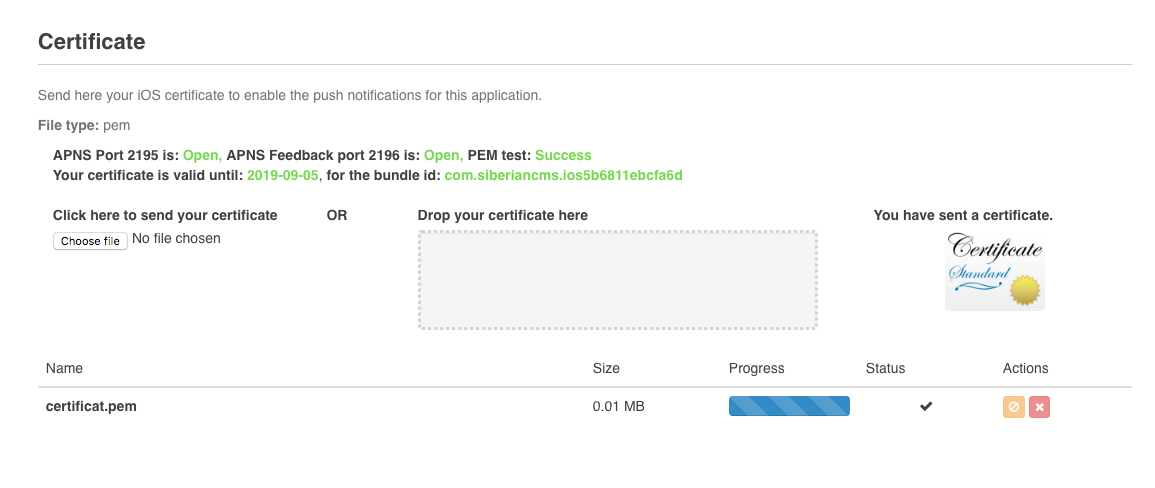
– Upload this certificat.pem on the app sheet in your backoffice
– You’re done!
More info about Push Notifications on the Apptekz platform
To send push notifications, you have 2 options to choose from:
- Send push to both iOS and Android in this case there must be the .pem certificate, and status on published for both.
- Send push on Android only, there must be no .pem certificate and the status for iOS must be on “waiting”.
In cases 1 & 2 you have to create a .pem certificate.
Before continuing the .pem certificate creation, let’s make a brief clarification about case 2. In case 2 there must be absolutely no certificate for ios, if you have already uploaded one, please remove it from both your files and your database. To remove the .pem certificate you have already uploaded, go first in your database, in the table “push_certificate”, look for the line in this table with the “app ID” of the app for which you want to remove the .pem certificate. You will get the name of the .pem certificate, it will be something like “cert_55c311wqce5e2.pem”. Copy this file name. Delete this line in the database (be sure to not remove the table! just the line which contains this .pem certificate related to the app). Then go in your files with your file manager or with Filezilla, go in var/apps/iphone and check for the .pem certificate you have just copied. Delete the file. You are done.
Only Apptekz can make changes to the database or file systems. Please open a support ticket if you need assistance with anything in this article.
Let’s continue the .pem certificate creation.
- All certificates are linked to each other, therefore the Apple Push Services certificate must be signed with the CSR used to create the iOS Distribution certificate used to create the provisioning profile. That means, if you change one of these items, your app will not be able to send push. For example, if you have already created a .pem certificate and you want to create it again, if you sign it with another CSR than the one used to create the iOS Distribution certificate used to create the provisioning profile of this app, you will have to edit the provisioning profile as well and to link it to the right iOS Distribution (the one created with the CSR you are using), and then you will have to submit an update of your app to the App Store and wait Apple has accepted your app.
- Your .pem certificate must be well created and must contain 4 sections:
– friendlyName: Apple Push Services
– friendlyName: iPhone Distribution
– And then two sections about keys with “Key Attributes:
If your .pem doesn’t contain these sections that means you have missed something and it will not work.
“One more thing” …about the .pem certificates:
This article provides information on how to create production .pem certificates. In order to make the push notifications work, the App must be set to ‘Published’.
Rather have us do your publishing? Check out the Apptekz App Publishing Service
We hope this information provided the necessary info to self-publish your apps. If you require more information or would like to purchase our Done For You Publishing Service, please reach out and let us know.