Resubmitting Rejected Apps
Overview
Rejections are something that nobody looks forward to, but fortunately, Apple rejections are often easy to fix. With Apple’s recent changes to their iTunes Connect interface, resubmitting your app for review after a rejection can be quick and painless.
Information
Who must resubmit my app for me, is this something that requires republishing new code?
This depends on the rejection. If the issue requires a full rebuild of the app (like for audio background play rejections, issues with the app icon/splash loading screen, etc.) then we’ll need to correct the issue, regenerate the source code, compile in XCODE, then upload new files. However, most rejections don’t require a rebuild. If you control the content, then most likely it can be handled without republishig. Examples would be rejections based on tab content, app design, and metadata (app name, description, rating, keywords, screenshots, etc.).
Resubmitting an App
Before doing anything, make sure you completely understand the rejection. Log into iTunes Connect and click My Apps. Locate the rejected app and click it to go to the listing.
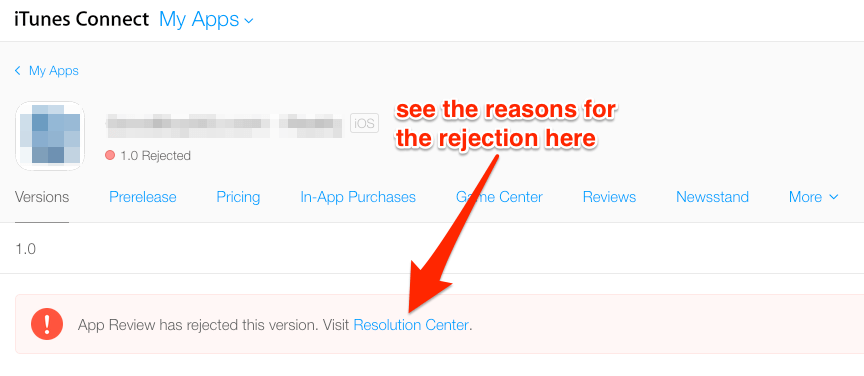
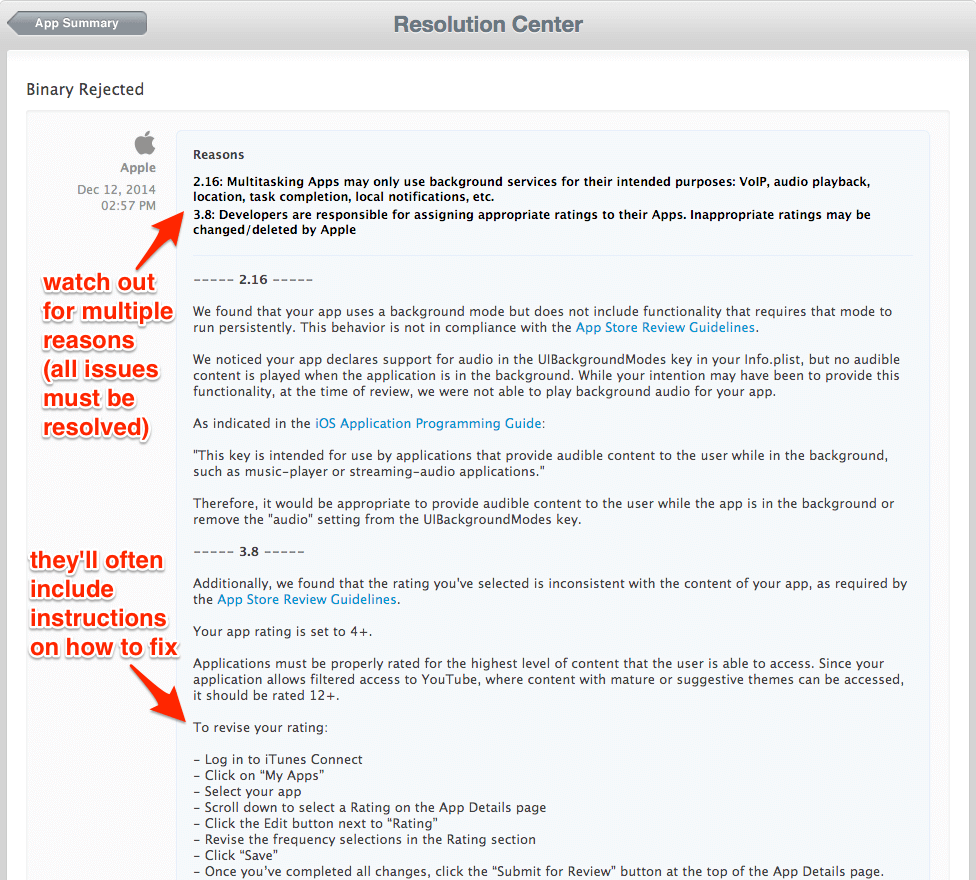
You’ll be taken to a screen with the full rejection message, like below. Read it over, and pay close attention to EACH rejection reason. If there’s more than one, you’ll need to go through them one-by-one and verify you’ve fixed them before resubmitting.
NOTE: Keep in mind, if you’re ever unclear on how to resolve your rejection, or are unable to do so on your own, it’s crucial that you open an Apptekz support ticket. In many situations (like reason 2.16 below) the app may need to be regenerated after correcting the issues outlined.
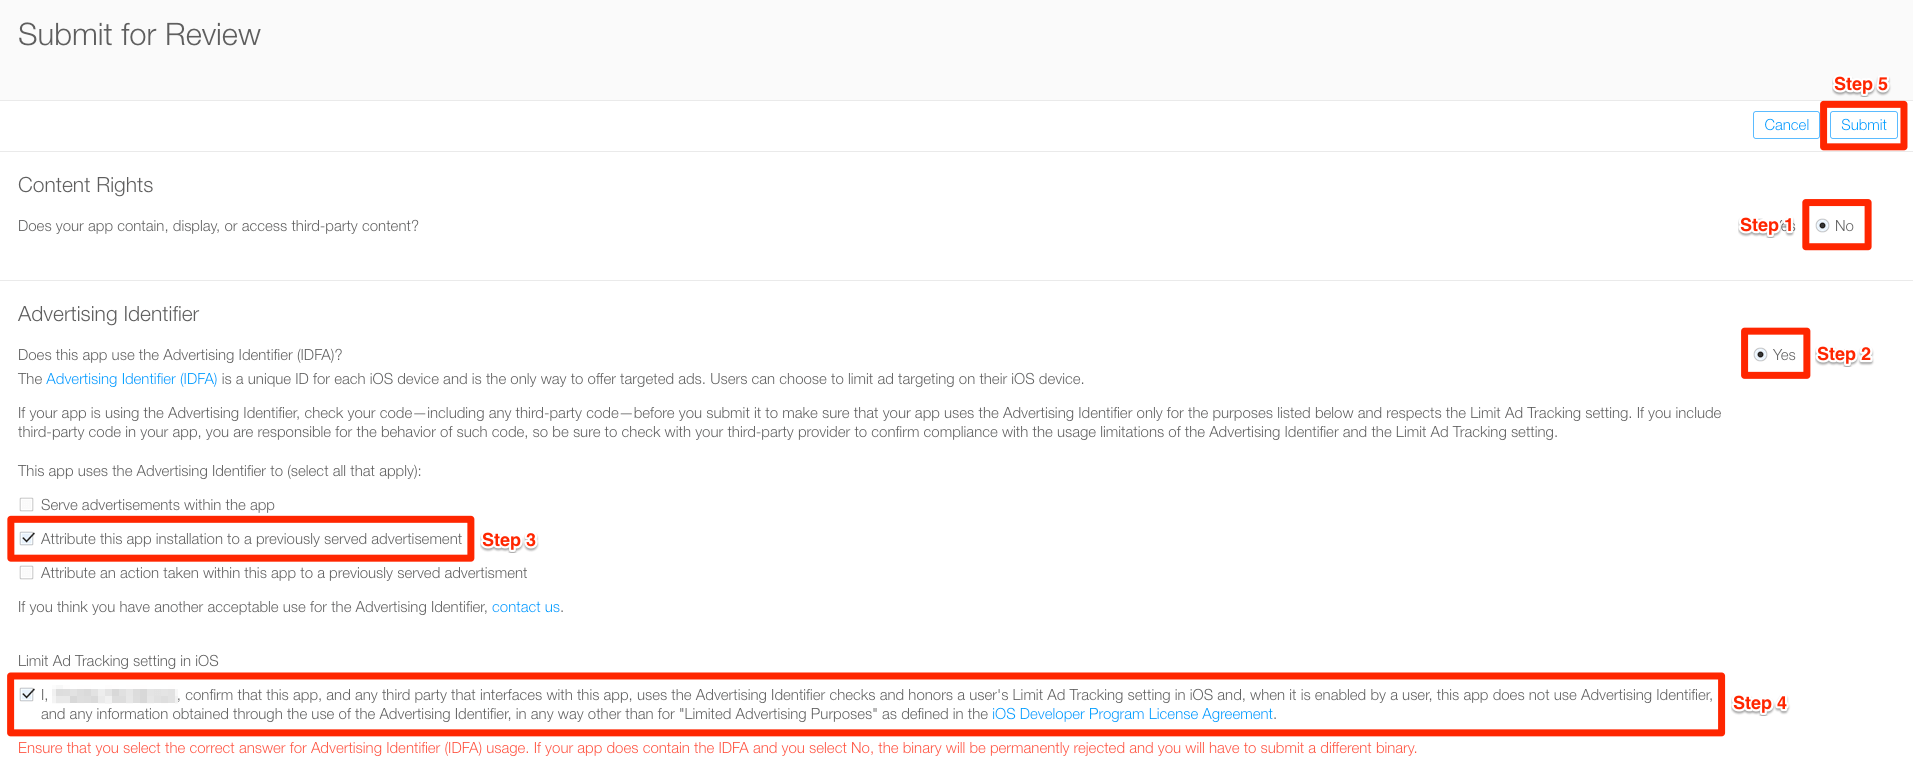
Once you fix the issues indicated, either in the app itself or in the app’s listing in Connect, you’ll be ready to resubmit. Return to the app listing page from the first screenshot. On the right-hand side, click Submit for Review.

On the next page:
- Select. “No” for Content Rights.
- Select “Yes” for Advertising Identifier.
- Check the box for “Attribute this app installation to a previously served advertisement.” Leave the other two options unchecked.
- Check the agreement box under Limit Ad Tracking setting in iOS.
- Click the Submit button at the top right to resubmit!
Confirmation
When the resubmission goes through, the app will automatically switch back to “Waiting for Review.”
If the app was rejected, it will re-enter Apple’s queue for review. If the app was metadata rejected, it holds its place in line, and will generally re-enter review within a couple of days.
Have questions or need assistance? Send an email or open a support ticket and we’ll help you through the steps.