
How to Implement the Calendar Feature
The Calendar feature provides the ability publish events on the calendar and allows app users to view, share, and RSVP to the events. Publish the time, place and date of events, as well as images and links. Both iCal and Custom events are available within this feature.
To create an Event Calendar, click on the “Calendar” feature icon:
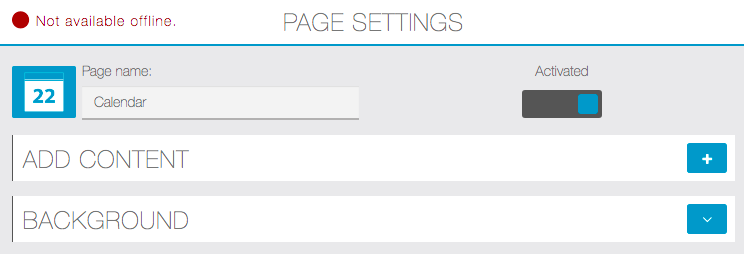
Once the feature has been activated, you will get the following configuration screen.
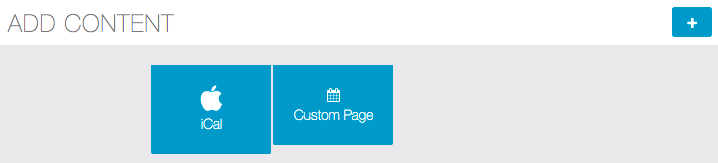
Click on ![]() to add a calendar. You have 2 options (iCal or Custom Page):
to add a calendar. You have 2 options (iCal or Custom Page):
To use iCal to publish an event:
Click on iCal:

- Go to the Google Calendar used to publish your events
- Create your event
- Find the agenda’s URL
- To do this, click on the “Share this Calendar“
- Click on “Calendar Details“
- Click on “ICAL” in the Calendar Address
- Copy this address and paste it into the “Calendar’s URL” field
- Save by clicking OK to validate the event
To use the Custom Page option:
Click on Custom Page:

Enter the name of your Calendar and then click OK:
To create a new event click on the ‘Event Button”


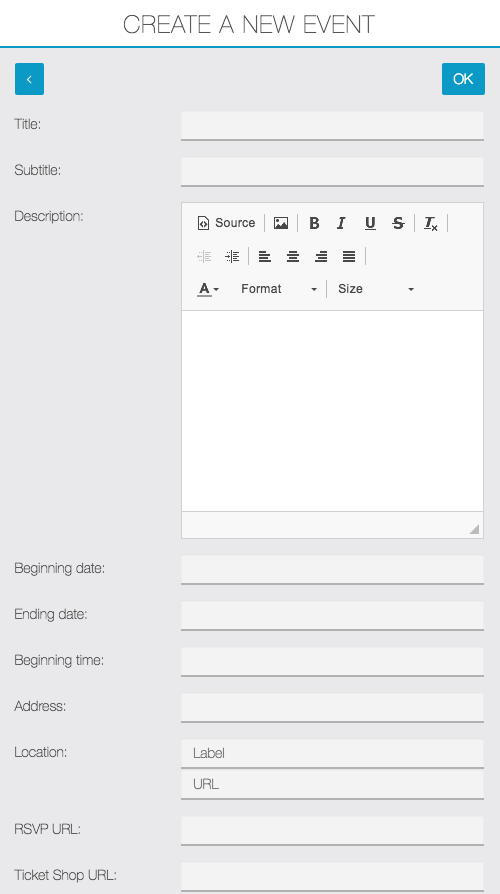

Enter all of the required information for your event and add an illustration picture in the provided fields.
Once the Event Calendar is configured, add custom CSS from the Mobile App Builder to complete the customization.
For more robust event management or to build an Event focused app, consider using the Event Pro feature