How to implement the E-Wallet Feature
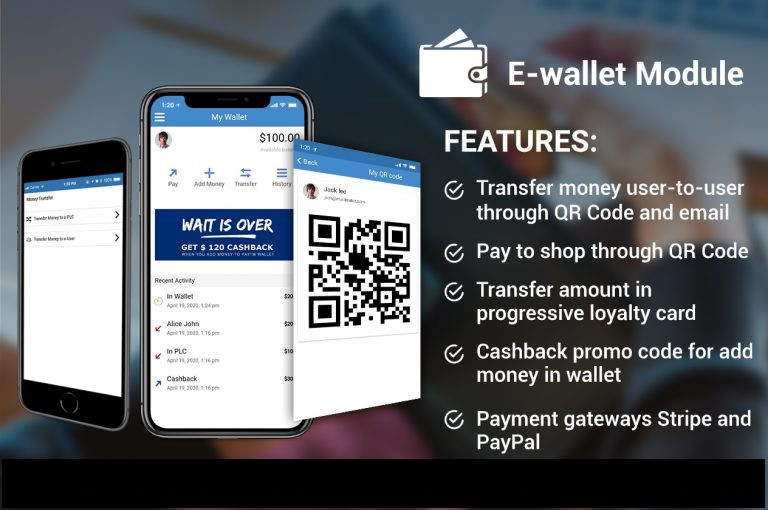
The E-Wallet feature is a Mobile App based Digital Wallet that enables app users to make online transactions. The E-Wallet feature allows users to quickly and easily add money to an App based wallet using Stripe or PayPal.
Features
- Transfer money user-to-user through QR Code and email (in wallet)
- Pay to shop through QR Code
- Transfer an amount from e-wallet to progressive loyalty card
- Cashback promo code to add money in wallet
- Connect to Payment Gateways such as Stripe and PayPal
Feature Description:
Wallet Money
- This is a digital wallet or mobile wallet used for online shopping.
- Customer can Pay shop using a QR code (created by admin) and money is transferred to shop wallet (Not using bank account).
Transfer to a Loyalty Card
- Customer can transfer e-wallet balance amount to the progressive Loyalty Card.
Transfer to a Customer
- Customer can transfer wallet money to another customer wallet in the same app.
- E-Wallet module does not allow transfer from wallet to any bank account.
QR Code
- QR code is used to transfer a e-wallet amount to another Customer Wallet or Shop Wallet without entering an email ID or Code.
- The purpose of using QR Code is to make it easy to transfer between e-wallets.
Store
Create a QR code for Store to allow customer to pay the amount using their eWallet. Money is transferred from customer e-wallet to Store e-wallet. The Store’s wallet history is displayed inside the mobile app editor.
Setup
Follow the step by step setup process of the E-wallet module below. We’ll go into detail on each and every option of the different sections of E-wallet module. (Settings, Store, Gateways, Promo Code, Slider & History)
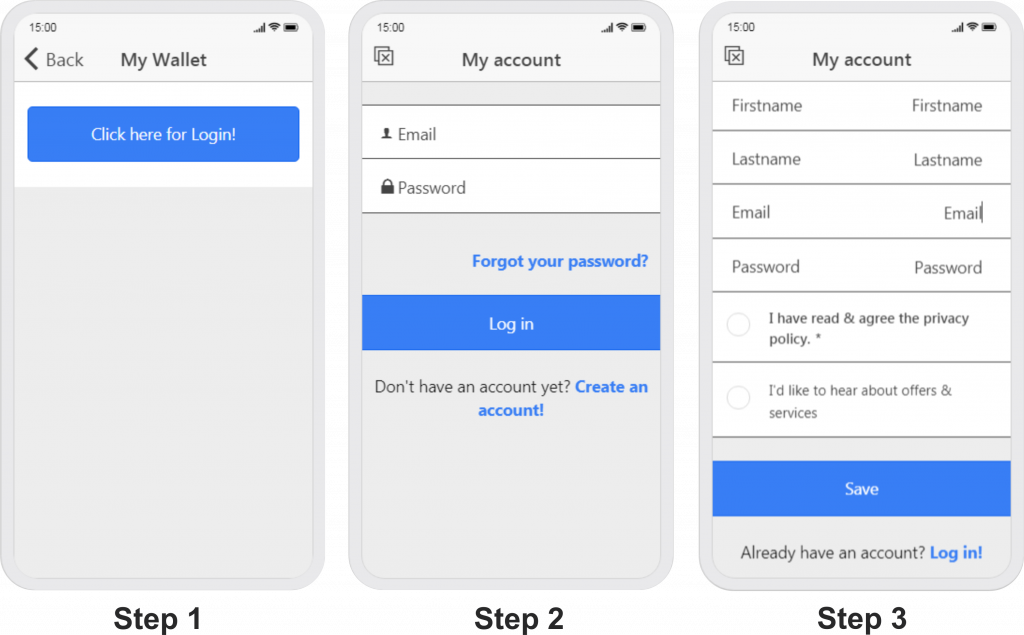
Each app user must login with a unique ID & Password to use the e-wallet. To do this, they will need to create an account & login to activate their e-wallet.
Settings
Through settings we can enable or disable transfer, set Minimum and Maximum limit of adding amount in wallet, add the email address of the admin (usually App Owner) regarding any updates about E-wallet.
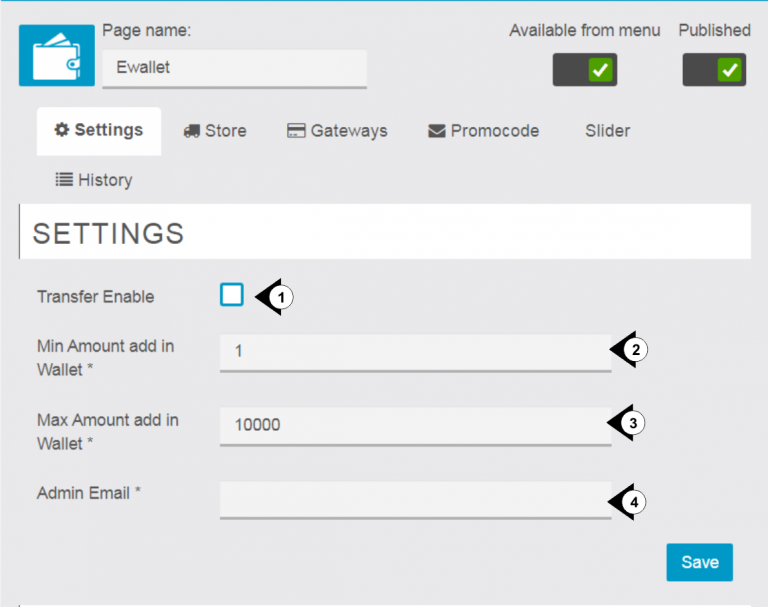
- Transfer Enable: Through Transfer Enable we can transfer our E-wallet points in to progressive loyalty card & others.
- Min Amount add in Wallet: Here we mention the limit of minimum amount is must to be add in a wallet.
- Max Amount add in Wallet: Here we mention the maximum up to how much amount you will add in a wallet.
- Admin Email: Here you mention the admin email for getting notifications and updates regarding the E-wallet.
Store
The Store section enables the creation and management of new stores and their E-wallet transactions as well as the shop’s earnings. Stores can be added, deleted or modified as needed.
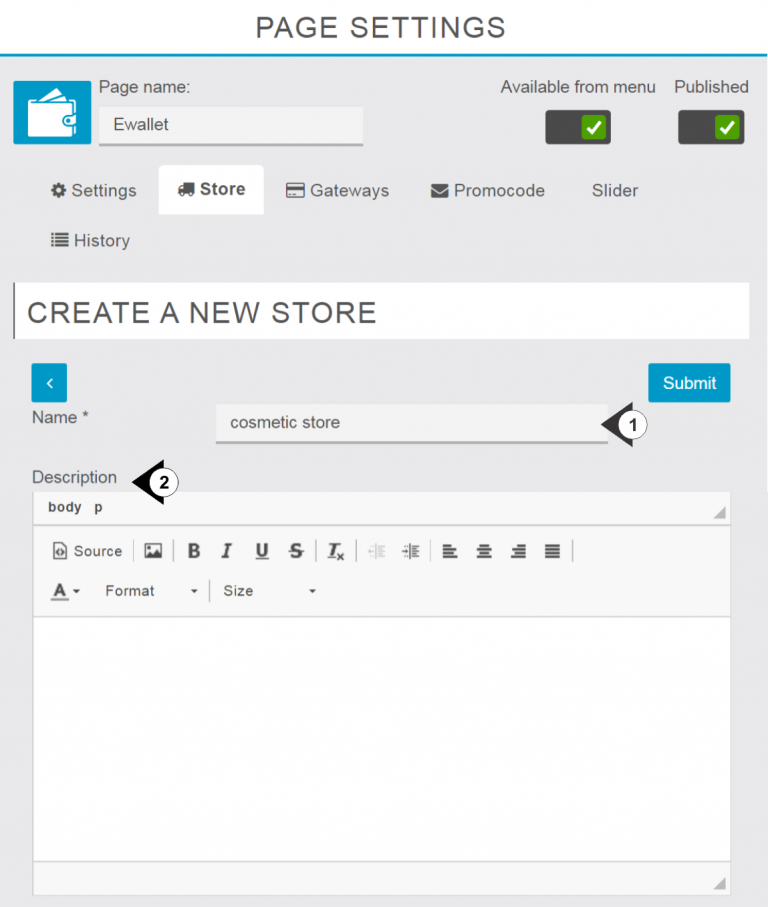
- Enter Store name in the ‘Name’ field.
- Enter Store details or text important info related to the store in the ‘Description’
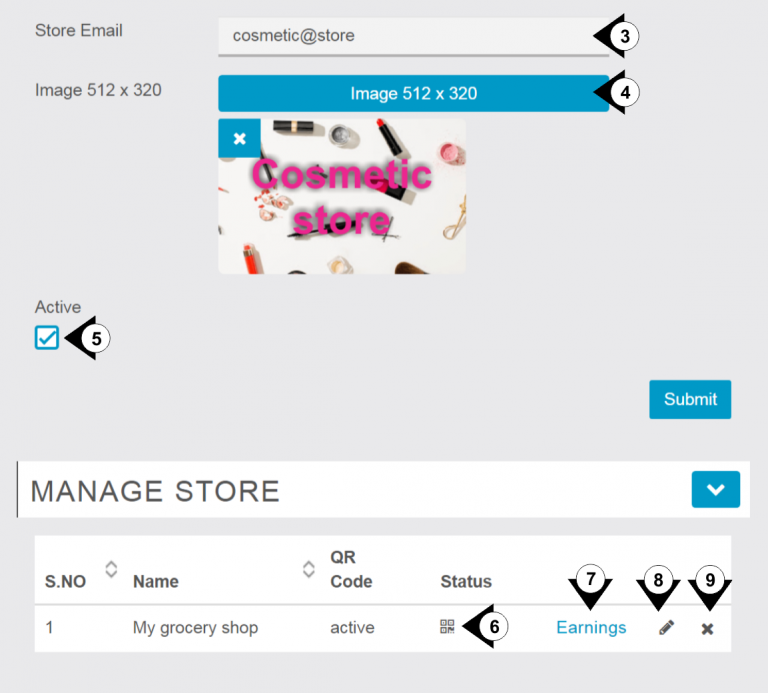
- Enter Store email for E-wallet transactions.
- Upload Store Banner (recommended image size = 512 x 320 px)
- Check the box to set the Store to “Active’.
- Click on QR Code icon to get the QR code image for scanning and receiving quick payments in store’s E-wallet.
- Click on “Earnings” link to view your store’s earnings collected through e-wallet.
- Click ‘edit’ icon icon to edit your exiting content.
- Click ‘X’ button to delete an existing store.
Gateways
Gateways section enables configuration of payment gateways for adding the amount in your E-wallet.
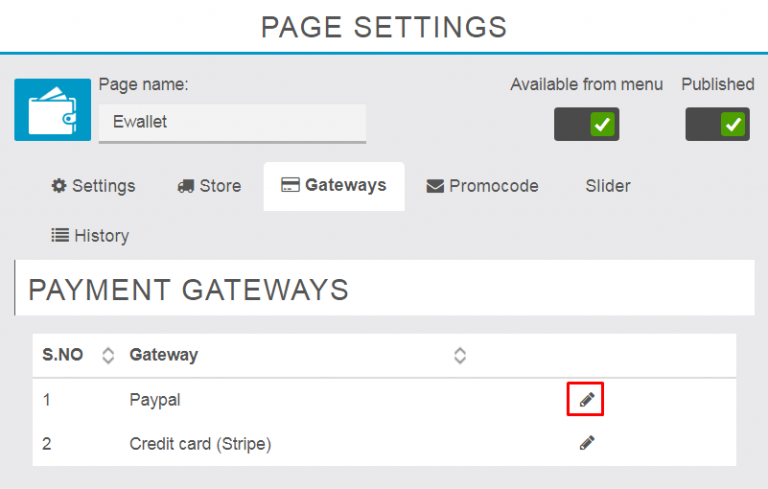
Click on “edit” icon to add or edit Gateways details.
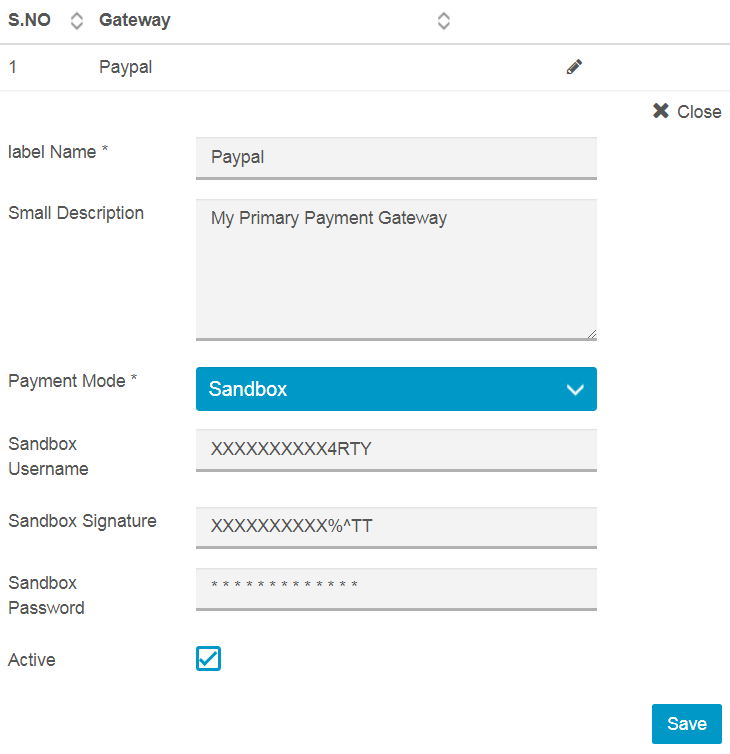
Paypal Configuration
Enter the Paypal details for the Store to enable the Paypal Gateway.
The following required information must be entered as shown below.
- Username
- Signature
- Password
Note: Under Paypal payment gateway configuration Payment Mode Sandbox is a virtual mode only for testing purposes and Live is a real mode of payment for live transactions. You can select the “Payment Mode” by drop down list under Payment Mode section.
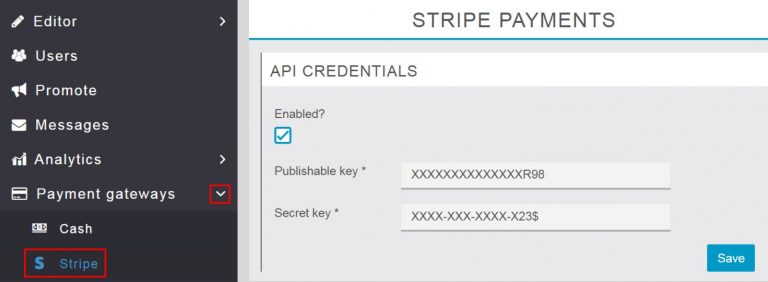
Stripe Configuration
Once Stripe is configured, mark it active with the check box, then click on “save” button.
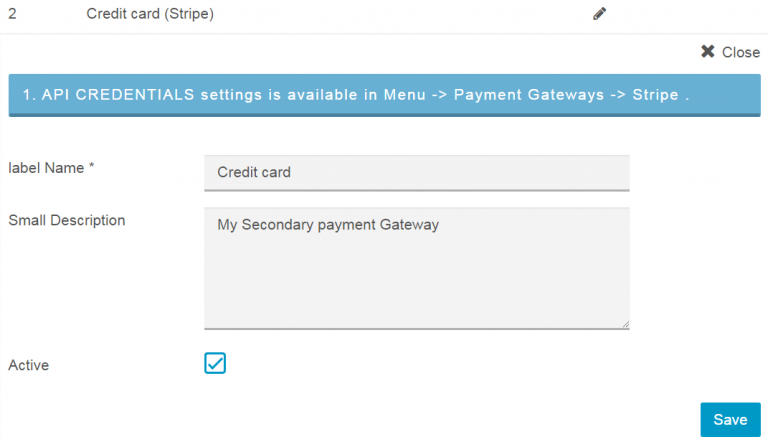
To configure “Stripe” for the first time, go to Menu, then click on Payment Gateways, then select Stripe from the available options. Under stripe Payments section, check ‘Enabled’ to enter API credentials. Enter ‘Publishable Key; and ‘Secret Key’, then “save” configuration.
Promo code
Promo code tab enables creation of multiple promo codes for promotions that can increase the number of transactions through the Store’s payment wallet. Some discounts can be done as payment transfers of a fixed amount or on a percentage basis for a particular period of time. It’s also possible to edit and remove the old promo codes as needed.
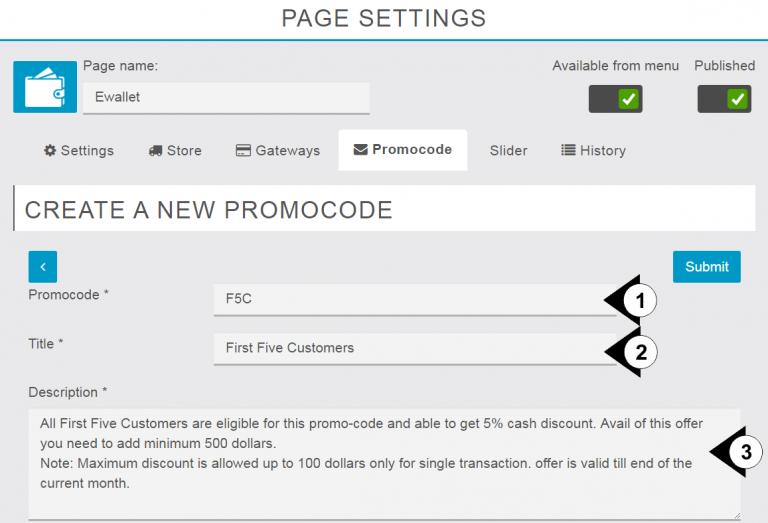
- Promo code: Enter Promo Code text that app users must provide to redeem promotional offers.
- Title: Short Name of the promo to describe the offer
- Description: Details about the offer, terms and conditions for a particular promo code such as minimum transaction value and maximum discount amount and validity.
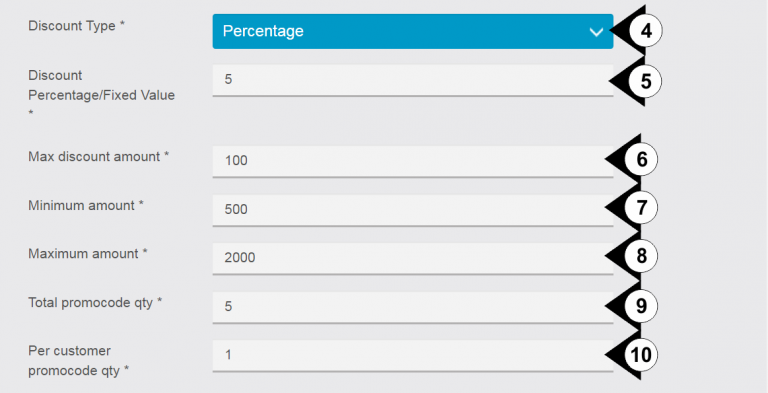
- Discount Type: Use drop down menu to select discount type (Percentage or Fixed amount).
- Discount Percentage/Fixed Value: Enter Discount percentage or Fixed amount to be discounted with the promo code.
- Max discount Amount: Set the limit for maximum discount allowed with promo code.
- Minimum amount: Set the conditional minimum add amount value to use the promo code.
- Maximum amount: Set the limit of highest amount of discount value that can be applied to a promo code.
- Total promo code qty: Set the total number of usable quantity of promo code.
- Per customer promo code qty: Set # of times the user may use the same promo code to redeem the discount.

- Valid from: Enter the start date and time of promo code.
- Valid until: Enter the valid till date and time of promo code.
- Image 512×320: Upload promo banner image. Image size must be 512 x 320 px.
- Active: Check box tp Activate promo code.
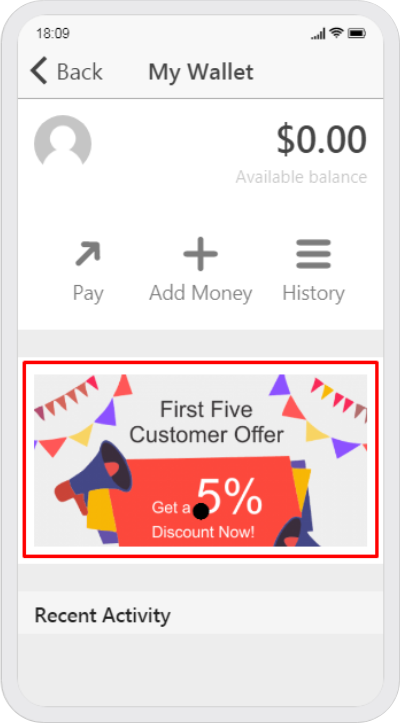
Slider
Slider option enables publishing promotional flyers (Sliders) on the home screen of the ewallet feature of the app. Multiple slider images can be added if desired. Promo Slider display duration can be set according to campaign requirements.

- Name: Set the name of Slider image campaign.
- Valid from: Set the start date of displaying image.
- Valid until: Here you can set the end date of displaying image.
- Image 512 x 320: Upload banner image.
- Active: Activate Slider Image by checking the box..
History
History tab provides all records of e-wallet transactions and details about e-wallet users and stores.
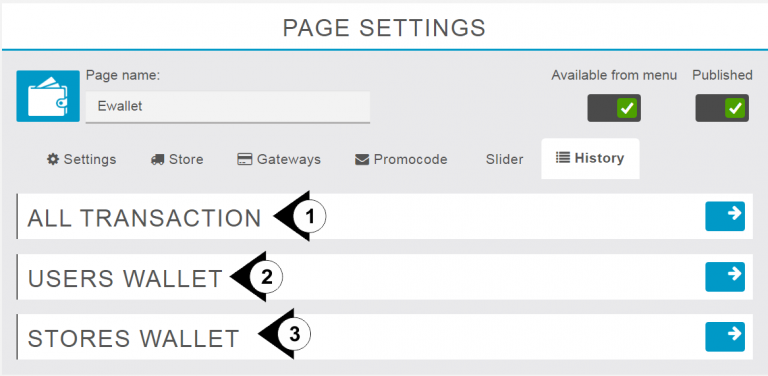
- ALL TRANSACTIONS: Click on Blue “Arrow Button” to open new window to get complete details under “User Transaction Report”. Filter transactions by time periods & users. This view provides details of transaction ID, Email, Name, Amount, Category, Date and Status.
- USERS WALLET: Click on Blue “Arrow Button” to open new window to get complete details about wallet filtered by user’s ID, Email, Name, Balance and Last Update.
- STORES WALLET: Click on Blue “Arrow Button” to open new window to get complete details about Store’s Wallet filtered by Store ID, Email, Store Name, Status, Current Balance, Last Update and Earnings. Earnings link provides detailed information about store’s wallet including: Net Income, Withdrawn and Available for Withdrawal, along with details of completed transactions.